Just a sweet little poem to remind our fathers and our children's fathers how much they mean to us and how much we need them to guide us.
Happy Father's Day!
To print image: Right click on image and save to your computer. The image size is 8 1/2" x 11" but can be printed out at various sizes.
A lone little lady swallowed up in a houseful of "men". I NEED something a little pretty (or tasty, or skinny, or crafty awesome) every once in a while. Don't you think?
Thursday, June 18, 2015
Wednesday, April 1, 2015
Transformers Bingo
I put together these Transformers BINGO cards for my youngest boys 5th birthday party. He's super excited to play this with his friends this weekend.
Instructions: Click on each image and save to your computer. Print out one each of these 4 BINGO cards on card stock (I printed two per page). Cut out and laminate (if desired).
Next, print out these BINGO calling cards (3 pages, 9 altogether) on card stock; cut out and laminate (again, if desired). (Note, not all the cards are exactly the same size, although very close. The compulsive perfectionist inside of me is dying but, oh well....as a mother of five children I've learned that sometimes you just have to let things go. he he he....)
How to play: Place calling cards inside a box, container, or envelope. In random order pull out one card at a time. Have the children mark the corresponding picture on their individual boards with buttons, pieces of candy, or other small objects (appropriate for their age). If you chose to laminate, dry-erase markers work really well for this.
The object is to be the first to mark off three pictures in a row. When this is accomplished, child shouts out "BINGO" or in this case "Transformers, roll out!" and wins a prize. Play for desired length of time or until all children get a prize.
Enjoy! Happy Bingo-ing!
Instructions: Click on each image and save to your computer. Print out one each of these 4 BINGO cards on card stock (I printed two per page). Cut out and laminate (if desired).
Next, print out these BINGO calling cards (3 pages, 9 altogether) on card stock; cut out and laminate (again, if desired). (Note, not all the cards are exactly the same size, although very close. The compulsive perfectionist inside of me is dying but, oh well....as a mother of five children I've learned that sometimes you just have to let things go. he he he....)
How to play: Place calling cards inside a box, container, or envelope. In random order pull out one card at a time. Have the children mark the corresponding picture on their individual boards with buttons, pieces of candy, or other small objects (appropriate for their age). If you chose to laminate, dry-erase markers work really well for this.
The object is to be the first to mark off three pictures in a row. When this is accomplished, child shouts out "BINGO" or in this case "Transformers, roll out!" and wins a prize. Play for desired length of time or until all children get a prize.
Enjoy! Happy Bingo-ing!
Thursday, October 30, 2014
Allergy Friendly Trick-or-Treating House Sign
Another cute sign I will be posting this Halloween.....
This one was put together by my older sister Natalie. Both she and I have kiddos with severe nut allergies and this time of year (and Christmas--with all the yummy neighbor goodies) can put a mama on edge.
One great way to set a few minds at ease and to help little kiddos in your neighborhood feel safe this Halloween is to 1) Purchase a few "prizes" to hand out to allergy kids that are non-food items (pencils, spider rings, etc) 2) Post a sign like the one below to let others know you are allergy conscious and/or 3)Paint a pumpkin teal and place it on your porch--signifying your allergy consciousness as well (Check out the Teal Pumpkin Project for more information).
I plan to do all three. Isn't it cute?
Happy Halloween Y'all!
This one was put together by my older sister Natalie. Both she and I have kiddos with severe nut allergies and this time of year (and Christmas--with all the yummy neighbor goodies) can put a mama on edge.
One great way to set a few minds at ease and to help little kiddos in your neighborhood feel safe this Halloween is to 1) Purchase a few "prizes" to hand out to allergy kids that are non-food items (pencils, spider rings, etc) 2) Post a sign like the one below to let others know you are allergy conscious and/or 3)Paint a pumpkin teal and place it on your porch--signifying your allergy consciousness as well (Check out the Teal Pumpkin Project for more information).
I plan to do all three. Isn't it cute?
Happy Halloween Y'all!
Tuesday, October 21, 2014
"Trick FOR Treat" Sign
I'll be the first to admit I'm a bit of a Halloween "Hum Bug". Honestly, it is NOT my favorite holiday....at all. Don't get me wrong....I LOVE the part about the candy and about eating it, but everything else I could leave by the wayside.
What I especially dislike about Trick-or-Treating is the hoards of teenagers that end up on my doorstep. I mean, COME ON! Not that I never did it. In fact I did. Once. When I was 14. It was the most humiliating experience of my life and I never attempted it again.
Anyway....
These last few years I've come up with a way to enjoy having these too-old-for-trick-or-treating-aged-kids come up my steps rather than being annoyed at their freeloaderness-ess. I've taken the term "trick or treating" and tweaked it just a bit. For the aforementioned ones, I call it "trick FOR treating".
This is how it works. They do a trick for me....I give a treat to them. Ta Da! That's it. Not so hard but very entertaining. I figure that as long as they are embarrassing themselves (by begging me for candy) they might as well have to really embarrass themselves by doing something funny for me.
This year I decided to give them a little fair warning. I'm not much of a poet but tonight this little ditty came together quite nicely. Enjoy and feel free to copy (right click on image and save to your computer):
Happy Halloween Y'all!
What I especially dislike about Trick-or-Treating is the hoards of teenagers that end up on my doorstep. I mean, COME ON! Not that I never did it. In fact I did. Once. When I was 14. It was the most humiliating experience of my life and I never attempted it again.
Anyway....
These last few years I've come up with a way to enjoy having these too-old-for-trick-or-treating-aged-kids come up my steps rather than being annoyed at their freeloaderness-ess. I've taken the term "trick or treating" and tweaked it just a bit. For the aforementioned ones, I call it "trick FOR treating".
This is how it works. They do a trick for me....I give a treat to them. Ta Da! That's it. Not so hard but very entertaining. I figure that as long as they are embarrassing themselves (by begging me for candy) they might as well have to really embarrass themselves by doing something funny for me.
This year I decided to give them a little fair warning. I'm not much of a poet but tonight this little ditty came together quite nicely. Enjoy and feel free to copy (right click on image and save to your computer):
Happy Halloween Y'all!
Tuesday, February 19, 2013
Skinny Tomato Bacon Alfredo
I was browsing around Pinterest a while ago trying to find a good, skinny, pasta recipe that didn't use marinara sauce. Don't get me wrong. I LOVE marinara, but my kids.....don't. They wont even touch the stuff.
I ran across a couple of recipes of promise but that weren't quite what I was looking for (tempering eggs...come on, who does that?), but that gave me a great jumping off point. I googled a few other ideas, and found a great basic skinny(er) Alfredo recipe, then added my own flair.
Bada Bing, Bada Boom! Ta Da! The birth of a new favorite recipe. It's been on our menu quite a few times now.
Fast, Easy, and very VERY tasty!
And so I share it with you.
Presenting.....
SKINNY TOMATO BACON ALFREDO
(recipe yields 6-1 cup servings)
1 cup non-fat milk
1-1/2 - 2 TBSP corn starch
1 cup reduced sodium chicken broth (or 1 cup water with 1 bullion cube)
1/4 cup light cream cheese (2 measured TBSP)
1/2 tsp garlic powder
1/4 tsp pepper
6-8 slices bacon, cooked crisp, then crumbled or chopped (or you can cheat like me and use Hormel's stuff in the jar--about 1/2 cup)
1 can petite diced tomatoes, drained well (or 3/4 cup diced or sliced plum or cherry tomatoes)
1/2 cup grated Parmesan cheese
Fresh (1/2 cup) or dried parsley (1/4 cup)
Salt to taste (optional)
1/2 tsp Red pepper flakes (optional)
1/2 lb pasta (seen here with bowtie and penne--we've used fettuccine as well)
Cook bacon (if applicable), draining as much fat as possible, allow to cool and either crumble or chop. Set aside.
Fill medium pot with water and add salt according to the directions on the pasta. Then, for perfect al dente pasta every time, use this tip I learned from my mother in law. Once the water is boiling and the noodles have been added, continue at a boil for about1 minute. Cover pot and take off the heat. Allow noodles to sit in the hot water while you prepare (or heat) the sauce. When the sauce is done, the noodles will be done also. Drain as usual. So easy and your pasta NEVER boils over on your stove. YEAY!
Next, in a medium sauce pan, whisk milk and cornstarch together until smooth. Whisk in broth and place over low heat. Add the cream cheese, garlic powder, pepper, salt (optional), and red pepper flakes (optional). Bring mixture to a simmer and cook until the sauce thickens. Once sauce has thickened, add drained tomatoes and bacon pieces. Whisk in the parmesan cheese and cook 1-2 minutes more, stirring constantly. Take off heat and add parsley.
Drain pasta and toss with sauce.
After it's dished up, sprinkle with a little more Parmesan cheese, if you desire and ENJOY.
Side this amazing dish with this SUPER EASY 1-hour French Bread (pictured here) and broccoli, or a veggie packed salad.
Friday, February 8, 2013
Featured at The Essentail Homemaker
Listen up peeps. :)
Today I'm over at The Essential Homemaker teaming up with my lovely sister and sharing with ya'll one of my favorite tasty treats. So so yummy!
Come on over and check it out.
Hang out for a bit and take a look around.
She's got some amazing things to see.
Today I'm over at The Essential Homemaker teaming up with my lovely sister and sharing with ya'll one of my favorite tasty treats. So so yummy!
Come on over and check it out.
Hang out for a bit and take a look around.
She's got some amazing things to see.
Tuesday, January 29, 2013
Bread Baking Basics and a Recipe, too.
Now, I am no bread baking expert.
I know this may come as a shock to some of you.
I was married for almost 9 years before I baked my very first loaf of bread. No joke. I was afraid of it. "Too much work", I thought. But I was wrong. Surprisingly enough...it was a lot easier than I imagined it to be (especially if you have a mixer, like I do, that does all the kneading for you).
In fact, for the past year now, homemade bread has been used almost exclusively in this house. It took my boys a while to get used to the idea ("No more store bought bread?") but they are quite on board with it now.
I thought I'd share one of my favorite recipes and some bread making tips (marked with "*"), which have become quite useful in the past year as I have learned and experimented with the "art" of bread making.
10-12 cups whole wheat flour *1 (about 7 cups pre-ground whole wheat)
2 tablespoons dry instant yeast *2
1/3 cup high-gluten (80%) flour (optional) *3
1/2 tsp vitamin C powder (300 mg) (optional) *4
4 cups warm water (120 to 130 degrees) *5
1/3 cup vegetable/canola oil
1/3 cup honey or sugar
1 TBSP salt
Place 6 cups whole wheat into mixer bowl equipped with kneading arm. Add dry yeast, gluten flour , and vitamin C. Pulse to mix well. Add water, and mix for 1 minute. For lighter bread, turn off mixer, cover bowl, and let dough sponge (*6) for 10 minutes. Add oil, honey or sugar (*7), and salt. Turn on mixer, and quickly add remaining flour, 1 cup at a time, until dough forms a ball and cleans the sides of the bowl (you should be able to see the bottom of the bowl too). The amount of flour needed may vary. Knead 4-6 minutes (*8) in a mixer and 12-15 minutes, at least, if kneading by hand, until dough is smooth and elastic.
Lightly oil hands and counter top. Divide dough into 4 equal portions. Shape into loaves (*9) and place into greased bread pans.
Fast Rise: While shaping dough, preheat oven to lowest setting (at least 150 degrees). Once oven has preheated and bread is ready to go in turn the power off. Place bread in oven, arranging pans with space between to allow heat to circulate freely. Watch closely. Let rise until almost double in bulk, approx. 20-30 minutes. Leave bread in over and turn heat to 350 degrees.
Normal rise:
Leave bread in pans, uncovered, on the counter top until double, approx 1 hour (depending on the temp in your house). Bake in a preheated 350 degree oven for 30-35 minutes.
Immediately remove pans; let bread cool on wire racks. For a soft crust, mist lightly with water from a spray bottle (*9) while still hot. Or, lather tops in butter or shortening.
Slice bread when cool. Store in plastic bags in freezer, not refrigerator.
Tips/Notes:
*1 Hard white wheat is best if grinding wheat for bread. To assist in making the transition to 100% whole wheat bread, replace a fourth to half of the whole wheat flour with unbleached white flour. Gradually increase the ratio as time goes on.
*2 There is a difference between instant yeast (and bread machine) and regular. Regular yeast has to be cultured in warm liquid before being added into a recipe, instant (and bread machine) does not.
*3 High-gluten flour is a high protein (80%) flour available at most health food stores. It adds volume and improves texture in whole wheat bread.
*4 Can add 2 TBSP lemon juice (with wet ingredients) instead of vitamin C powder for improved texture).
* 5 For improved texture, add 1 cup buttermilk or yogurt in place of 1 cup of the water. (you can make your own buttermilk by placing 1 TBSP lemon juice in a 1 C measuring cup and then filling the remainder with milk).
*6 Not a necessary step because recipe calls for instant yeast BUT sponging dough makes lighter bread and reduces kneading time. This is very important if kneading by hand.
*7 If diabetic or hypoglycemic, or you just want to, you can substitute a natural sweetener for the honey or sugar, such as 1/2C to 3/4C unsweetened applesauce, or you can use Diastatic malt.
*8 Recipe says 7-10minutes of kneading in a mixer. I've read that 4-6 is enough. My mixer has a self kneading button and it only kneaded it for 3min and 27 seconds. Look for a smooth and elastic (springs back when touched) texture.
*9 Place divided dough on an oiled (not floured) surface and pound dough to get the air out. Shape into an oval shape and roll around until it reaches the desired length. Pinch ends together in the center on the underside and place in bread pan.
I hope this helps some of you who are just starting out. Experiment. Have fun!
And ENJOY the fruits (warm tasty bread with melty butter and jam on it) of your labors.
I know this may come as a shock to some of you.
I was married for almost 9 years before I baked my very first loaf of bread. No joke. I was afraid of it. "Too much work", I thought. But I was wrong. Surprisingly enough...it was a lot easier than I imagined it to be (especially if you have a mixer, like I do, that does all the kneading for you).
In fact, for the past year now, homemade bread has been used almost exclusively in this house. It took my boys a while to get used to the idea ("No more store bought bread?") but they are quite on board with it now.
I thought I'd share one of my favorite recipes and some bread making tips (marked with "*"), which have become quite useful in the past year as I have learned and experimented with the "art" of bread making.
Simply Perfect Setpoint Bread
Medium Batch--4 loaves
2 tablespoons dry instant yeast *2
1/3 cup high-gluten (80%) flour (optional) *3
1/2 tsp vitamin C powder (300 mg) (optional) *4
4 cups warm water (120 to 130 degrees) *5
1/3 cup vegetable/canola oil
1/3 cup honey or sugar
1 TBSP salt
Place 6 cups whole wheat into mixer bowl equipped with kneading arm. Add dry yeast, gluten flour , and vitamin C. Pulse to mix well. Add water, and mix for 1 minute. For lighter bread, turn off mixer, cover bowl, and let dough sponge (*6) for 10 minutes. Add oil, honey or sugar (*7), and salt. Turn on mixer, and quickly add remaining flour, 1 cup at a time, until dough forms a ball and cleans the sides of the bowl (you should be able to see the bottom of the bowl too). The amount of flour needed may vary. Knead 4-6 minutes (*8) in a mixer and 12-15 minutes, at least, if kneading by hand, until dough is smooth and elastic.
Lightly oil hands and counter top. Divide dough into 4 equal portions. Shape into loaves (*9) and place into greased bread pans.
Fast Rise: While shaping dough, preheat oven to lowest setting (at least 150 degrees). Once oven has preheated and bread is ready to go in turn the power off. Place bread in oven, arranging pans with space between to allow heat to circulate freely. Watch closely. Let rise until almost double in bulk, approx. 20-30 minutes. Leave bread in over and turn heat to 350 degrees.
Normal rise:
Leave bread in pans, uncovered, on the counter top until double, approx 1 hour (depending on the temp in your house). Bake in a preheated 350 degree oven for 30-35 minutes.
Immediately remove pans; let bread cool on wire racks. For a soft crust, mist lightly with water from a spray bottle (*9) while still hot. Or, lather tops in butter or shortening.
Slice bread when cool. Store in plastic bags in freezer, not refrigerator.
Tips/Notes:
*1 Hard white wheat is best if grinding wheat for bread. To assist in making the transition to 100% whole wheat bread, replace a fourth to half of the whole wheat flour with unbleached white flour. Gradually increase the ratio as time goes on.
*2 There is a difference between instant yeast (and bread machine) and regular. Regular yeast has to be cultured in warm liquid before being added into a recipe, instant (and bread machine) does not.
*3 High-gluten flour is a high protein (80%) flour available at most health food stores. It adds volume and improves texture in whole wheat bread.
*4 Can add 2 TBSP lemon juice (with wet ingredients) instead of vitamin C powder for improved texture).
* 5 For improved texture, add 1 cup buttermilk or yogurt in place of 1 cup of the water. (you can make your own buttermilk by placing 1 TBSP lemon juice in a 1 C measuring cup and then filling the remainder with milk).
*6 Not a necessary step because recipe calls for instant yeast BUT sponging dough makes lighter bread and reduces kneading time. This is very important if kneading by hand.
*7 If diabetic or hypoglycemic, or you just want to, you can substitute a natural sweetener for the honey or sugar, such as 1/2C to 3/4C unsweetened applesauce, or you can use Diastatic malt.
*8 Recipe says 7-10minutes of kneading in a mixer. I've read that 4-6 is enough. My mixer has a self kneading button and it only kneaded it for 3min and 27 seconds. Look for a smooth and elastic (springs back when touched) texture.
*9 Place divided dough on an oiled (not floured) surface and pound dough to get the air out. Shape into an oval shape and roll around until it reaches the desired length. Pinch ends together in the center on the underside and place in bread pan.
I hope this helps some of you who are just starting out. Experiment. Have fun!
And ENJOY the fruits (warm tasty bread with melty butter and jam on it) of your labors.
Monday, January 28, 2013
Spinach Bacon Craisin Salad
When engaging in a weight loss journey, I often get asked what I eat. For lunch especially.
The answer. Salads....lots of salads. Why? Because, in choosing the RIGHT ingredients, they can be VERY LOW in calories AND very filling at the same time. Plus, they're packed full of "good things to eat" (name that book....).
On the other hand, eating salads every day can get very monotonous. Sigh....
So I change it up...A LOT.
This version is one of my favorites. It's a little higher in calories that some of my "others" but totally guilt-free and worth it. (Who says healthy food has to be icky and boring?)
Years ago, my sister introduced me to a super tasty version of this. I tweaked it just a bit to lower the calories and add a bit more nutrition without giving up any flavor. I've been blissfully enjoying it ever since.
Serving for one:
1.5 cups romaine lettuce
1 cup fresh spinach (reg or baby)
1/2 cup low fat (2%) cottage cheese
2 TBSP Hormel REAL bacon pieces or bits (glass cylinder found in the condiments isle)
1/2 roma tomato (or 1/4 cup tomato) cut, diced, sliced (whatever your prefer)
1/4-1/3 cup Craisins (in any delicious variety)
Pile it on and enjoy.
To cut down the calories even more, replace the Craisins with 1/2 cup fresh fruit (diced strawberries or blueberries would be yummy)
The salad, as is, has 271 calories, 35 carbs (think energy for your workouts), 6 grams of fat, and 22 grams of protein.
I usually side the salad with one serving of whole grain crackers or bread (think, FIBER and fuel), a serving of carrots, large or baby (FIBER), and an apple or orange (FIBER and because I love them).
YEAY, that's a LOT of veggie and fruits but that's a good, healthy thing. Plus, it will keep you satisfied until dinner time.
If you DO eat a mid-afternoon snack, try saving the apple and carrots until snack time. Dip with 1-2 TBSP peanut (or other nut) butter (yes, I did just say to try dipping your carrots in PB. YUM!), enjoying a 200-300 calorie snack.
So there you have it. Any questions, comments, feel free to leave them.
DO YOU HAVE A FAVORITE HEALTHY SALAD?
The answer. Salads....lots of salads. Why? Because, in choosing the RIGHT ingredients, they can be VERY LOW in calories AND very filling at the same time. Plus, they're packed full of "good things to eat" (name that book....).
On the other hand, eating salads every day can get very monotonous. Sigh....
So I change it up...A LOT.
This version is one of my favorites. It's a little higher in calories that some of my "others" but totally guilt-free and worth it. (Who says healthy food has to be icky and boring?)
Years ago, my sister introduced me to a super tasty version of this. I tweaked it just a bit to lower the calories and add a bit more nutrition without giving up any flavor. I've been blissfully enjoying it ever since.
Spinach Bacon Craisin Salad
1.5 cups romaine lettuce
1 cup fresh spinach (reg or baby)
1/2 cup low fat (2%) cottage cheese
2 TBSP Hormel REAL bacon pieces or bits (glass cylinder found in the condiments isle)
1/2 roma tomato (or 1/4 cup tomato) cut, diced, sliced (whatever your prefer)
1/4-1/3 cup Craisins (in any delicious variety)
Pile it on and enjoy.
To cut down the calories even more, replace the Craisins with 1/2 cup fresh fruit (diced strawberries or blueberries would be yummy)
The salad, as is, has 271 calories, 35 carbs (think energy for your workouts), 6 grams of fat, and 22 grams of protein.
I usually side the salad with one serving of whole grain crackers or bread (think, FIBER and fuel), a serving of carrots, large or baby (FIBER), and an apple or orange (FIBER and because I love them).
YEAY, that's a LOT of veggie and fruits but that's a good, healthy thing. Plus, it will keep you satisfied until dinner time.
If you DO eat a mid-afternoon snack, try saving the apple and carrots until snack time. Dip with 1-2 TBSP peanut (or other nut) butter (yes, I did just say to try dipping your carrots in PB. YUM!), enjoying a 200-300 calorie snack.
So there you have it. Any questions, comments, feel free to leave them.
DO YOU HAVE A FAVORITE HEALTHY SALAD?
Thursday, December 13, 2012
Nutty-Mellow Popcorn Delight
Basking in the memory of it's tasty goodness I pulled together a piece here and a piece there to create this amazing concoction. I will admit.....it's still missing something....some "secret ingredient" (not counting the spiced gumdrops that my husband made me promise I would leave out). It's just not quite like the baking goddess's but it is still pretty dang good. I may just have to find a way to get in touch with her and beg her for her recipe. Until then, perhaps we should just enjoy a bit (or a lot) of this highly tasty morsel.
Think ultra gooey, ultra nutty, and ultra awesome.
Nutty-Mellow Popcorn Delight
(pulled together from Mama Cindy's (aka my mothers) recipe collection and allrecipes.com)
3 bags microwave popcorn**
2 cubes (1 cup) salted butter
2 10 oz bags mini marshmellows
1 cup granulated sugar
1/4 cup light corn syrup
1 tsp vanilla extract
Stir-ins (all are optional...get creative):
1 bag Peanut Butter M&M'S
1 bag Peanut M&M's
1 jar/canister honey roasted peanuts
1 cup small gumdrops (not featured in this picture)
sprinkles
Pop popcorn (**see notes below). Add stir-ins and set aside. In a large saucepan, heat butter, marshmallow, sugar and corn syrup on med-low heat until smooth (marshmallows are completely melted), stirring very often, if not continuously. Remove from heat; add vanilla. Pour marshmallow mixture over popcorn and mix until well coated. Spread onto wax paper until cool. Store in airtight container or bag.
**You are looking for the equivalent of about 12 cups popped popcorn (that makes it really gooey. If you want a dryer popcorn add 1-3 more cups.) Honestly, we usually use microwave popcorn (the "healthy" stuff with just a bit of butter and salt...yum) but you can used regular air popped as well. For microwave, use about 3 bags...for air pop you are looking at about 9 TBSP (just over 1/2 cup). It's really not an exact science...just a good jumping off point. :) Try to weed out as many of the un-popped kernel's as possible (no one likes to chomp into a hard kernel after all). You can do this by collecting the popcorn into a large brown paper sack (or a large bowl) and shaking lightly to "settle" the un-popped kernel's in the bottom. Then lightly hand spoon the popped corn into a (another) LARGE bowl.
To make a beautiful neighbor gift, press cooled popcorn into a cling wrap lined bread pan and form into a loaf. Wrap loaf with excess cling wrap and continue wrapping until covered. Add a bow for a fun touch.
And ENJOY!
Sunday, December 2, 2012
DIY: Dry Erase Wall Calendar
I've started decorating my house. Super Frugal (Pinterest inspired) Style.
You see...while the house we bought may be new to us, it is definitely not new. It was built in the late 70's. I really don't mind that, except that in the foreseeable future it will need a few repairs. (Starting with ripping out the nasty animal/urine stained carpet that was SUPPOSED to have been cleaned professionally. Never happened.). So...I need to be saving money anywhere I can on more "frivolous" things.
That's why I am ecstatic about today's project. It didn't cost me a thing. I had all the supplies already (that NEVER happens).
I have been scoping out Dry Erase Wall Calendars on Pinterest and found a few that I liked but didn't LOVE. So...I used those ideas as a "guideline" and made up my own. Now...before you all go thinking I am a creative genius, you are wrong. This took me HOURS upon HOURS to think up...and it really only evolved as I got going. I'm really surprised it turned out so cute...to tell you the truth.
Supplies used:
You see...while the house we bought may be new to us, it is definitely not new. It was built in the late 70's. I really don't mind that, except that in the foreseeable future it will need a few repairs. (Starting with ripping out the nasty animal/urine stained carpet that was SUPPOSED to have been cleaned professionally. Never happened.). So...I need to be saving money anywhere I can on more "frivolous" things.
That's why I am ecstatic about today's project. It didn't cost me a thing. I had all the supplies already (that NEVER happens).
I have been scoping out Dry Erase Wall Calendars on Pinterest and found a few that I liked but didn't LOVE. So...I used those ideas as a "guideline" and made up my own. Now...before you all go thinking I am a creative genius, you are wrong. This took me HOURS upon HOURS to think up...and it really only evolved as I got going. I'm really surprised it turned out so cute...to tell you the truth.
Supplies used:
*Picture frame (I used an old one my mother-in-law gave me years ago...Walmart has them for cheap)
*Paint for frame (if you want to change the color)
*Polyurethane to seal paint (which I haven't actually put on yet because SOMEONE threw it away during the move....Roberto!)
*Strip of my new favorite fabric (Paisley Floral Cream -by Sophia, purchase at Jellys Roll 2 Go)
*Coordinating Scrapbook Paper
*Permanent Marker
*Wrapping paper (with grids on the back)
Honestly, the HARDEST part was trying to measure and evenly space the boxes. I may, or may not, have sworn in my head (or even out loud) a few (many) times. Seriously! I ended up using wrapping paper that I (surprisingly) had. I used the grids to help measure the two inch length (my boxes are 2.75 inches by 2 in) so at least a few of my lines would be strait. :)
FYI...the days of the week ("Sunday, Monday, etc") and "notes" were written directly on the scrapbook paper, the boxes are drawn on the INSIDE of the glass (so the lines stay month after month), and the month ("May") and days of the month ("1, 2, 3, etc") are written on the OUTSIDE of the glass (so you can erase and change them every month).
I'm really REALLY happy with the finished product.
It's to be the main focal point on the empty kitchen. I was sure to incorporate all of the colors I want to use in the entire room to draw them all together.
More Super Frugal (Pinterest inspired) projects to come, I am sure.
Making Whites Whiter!!
I'm here today to talk laundry....AGAIN! Why? Because, as a mother of 4 boys, my life revolves around laundry. My life IS laundry. Laundry...Period. :)
As you can see, I've been putting it off for the last few days. Instead I've been busy painting my living room, cleaning up after painting my living room, teaching aerobics, holding cub scouts, preparing meals, changing diapers.....
Well, when my two oldest came to me complaining for lack of clothing to wear to school I realized the job could be put off no longer.
Here's what I saw after #3 gathered all of the baskets...
And these isn't even all of it. I already had a load in the washer and the dryer.
GASP!
To make matters worse, I had just emptied my LAST cup of store bought laundry detergent into the washer. Sigh....
Time to get back to FRUGALNESS!
Luckily I had all the ingredients on hand for my thrifty, nifty Homemade Laundry Detergent. I tweaked it a bit this time (taking some tips from Why Not Sew). We'll see if I like it better.
The REAL reason for my post today is because I am trying out a NEW method of making WHITES WHITER! I found this little ditty on Pinterest (my new best friend) and am totally going to try it out.
In this house, NOTHING stays white for long. Why should it when it can be stained with grass, dirt, and general muck, right?
Here is the "recipe":
HOT water
Fill the washing machine with HOT WATER (you can even BOIL a gallon or so of water on the stove to add to the washer to make it that much hotter). Then add the "ingredients". Agitate the machine for a few minutes (BEFORE ADDING CLOTHES) to allow dishwasher detergent to dissolve. THEN add clothes. Allow clothes to soak for as long as you can (overnight if possible). Finish cycle.
Because I have some time restraints (aka a million loads to get through today) and didn't have time to allow the load to soak in the washer, I turned to the bathtub. Yep...I said the bathtub (or a plastic tote would do).
I filled it with hot HOT water (yeah, we keep our water heater up pretty high), then added the laundry soap and bleach.
Next I filled a large pan with a gallon of water, set it on the stove to heat, and then added both the dishwasher detergent and the borax. By the time the water reached a boil, the detergent/borax had dissolved.
I added the water/detergent/borax to the bathtub and stirred. Now for the clothes.
(I would have taken a picture of this but I'd rather not post a pic of my unmentionables on the internet, thank you very much.)
I let the load soak in the tub for several hours (5-6) and then transferred them, in a basket, to the washing machine.
I ran them through a regular HOT cycle, with an extra rinse for good measure.
The end result was spectacular.
It truly did make my "whites" whiter.
I think I will make a regular habit of this. It's very nice to see things "glow" again. :)
As you can see, I've been putting it off for the last few days. Instead I've been busy painting my living room, cleaning up after painting my living room, teaching aerobics, holding cub scouts, preparing meals, changing diapers.....
Well, when my two oldest came to me complaining for lack of clothing to wear to school I realized the job could be put off no longer.
Here's what I saw after #3 gathered all of the baskets...
And these isn't even all of it. I already had a load in the washer and the dryer.
GASP!
To make matters worse, I had just emptied my LAST cup of store bought laundry detergent into the washer. Sigh....
Time to get back to FRUGALNESS!
Luckily I had all the ingredients on hand for my thrifty, nifty Homemade Laundry Detergent. I tweaked it a bit this time (taking some tips from Why Not Sew). We'll see if I like it better.
The REAL reason for my post today is because I am trying out a NEW method of making WHITES WHITER! I found this little ditty on Pinterest (my new best friend) and am totally going to try it out.
In this house, NOTHING stays white for long. Why should it when it can be stained with grass, dirt, and general muck, right?
Here is the "recipe":
HOT water
1 cup of laundry detergent (I'm using my homemade soap)
1 cup powdered dish washer detergent
1 cup bleach (or color safe bleach if any color present)
1/2 cup borax
Fill the washing machine with HOT WATER (you can even BOIL a gallon or so of water on the stove to add to the washer to make it that much hotter). Then add the "ingredients". Agitate the machine for a few minutes (BEFORE ADDING CLOTHES) to allow dishwasher detergent to dissolve. THEN add clothes. Allow clothes to soak for as long as you can (overnight if possible). Finish cycle.Because I have some time restraints (aka a million loads to get through today) and didn't have time to allow the load to soak in the washer, I turned to the bathtub. Yep...I said the bathtub (or a plastic tote would do).
I filled it with hot HOT water (yeah, we keep our water heater up pretty high), then added the laundry soap and bleach.
Next I filled a large pan with a gallon of water, set it on the stove to heat, and then added both the dishwasher detergent and the borax. By the time the water reached a boil, the detergent/borax had dissolved.
I added the water/detergent/borax to the bathtub and stirred. Now for the clothes.
(I would have taken a picture of this but I'd rather not post a pic of my unmentionables on the internet, thank you very much.)
I let the load soak in the tub for several hours (5-6) and then transferred them, in a basket, to the washing machine.
I ran them through a regular HOT cycle, with an extra rinse for good measure.
The end result was spectacular.
It truly did make my "whites" whiter.
I think I will make a regular habit of this. It's very nice to see things "glow" again. :)
Cinnamon Stick Nativity Ornaments
Here's what you need:
5 cinnamon sticks, about 3 inches each
1 whole star anise (find in bulk spice section or latin markets)
2 pieces of star anise
3 whole cloves (just need the little ball part)
1 small piece of cinnamon stick
raffia
glue gun
Step #1
Glue bottom of stable to sides
(leaving a little overhang allows for easier raffia installation)
(also, for this step, I try to find sticks that have a nice definite line down the middle)
Step #2
add two stick of cinnamon for the roof--
one at a time; lined sides facing down
(this is where you can use your cinnamon stick that either
don't have a nice line down them or are twisted)
(this is where you can use your cinnamon stick that either
don't have a nice line down them or are twisted)
Step #3
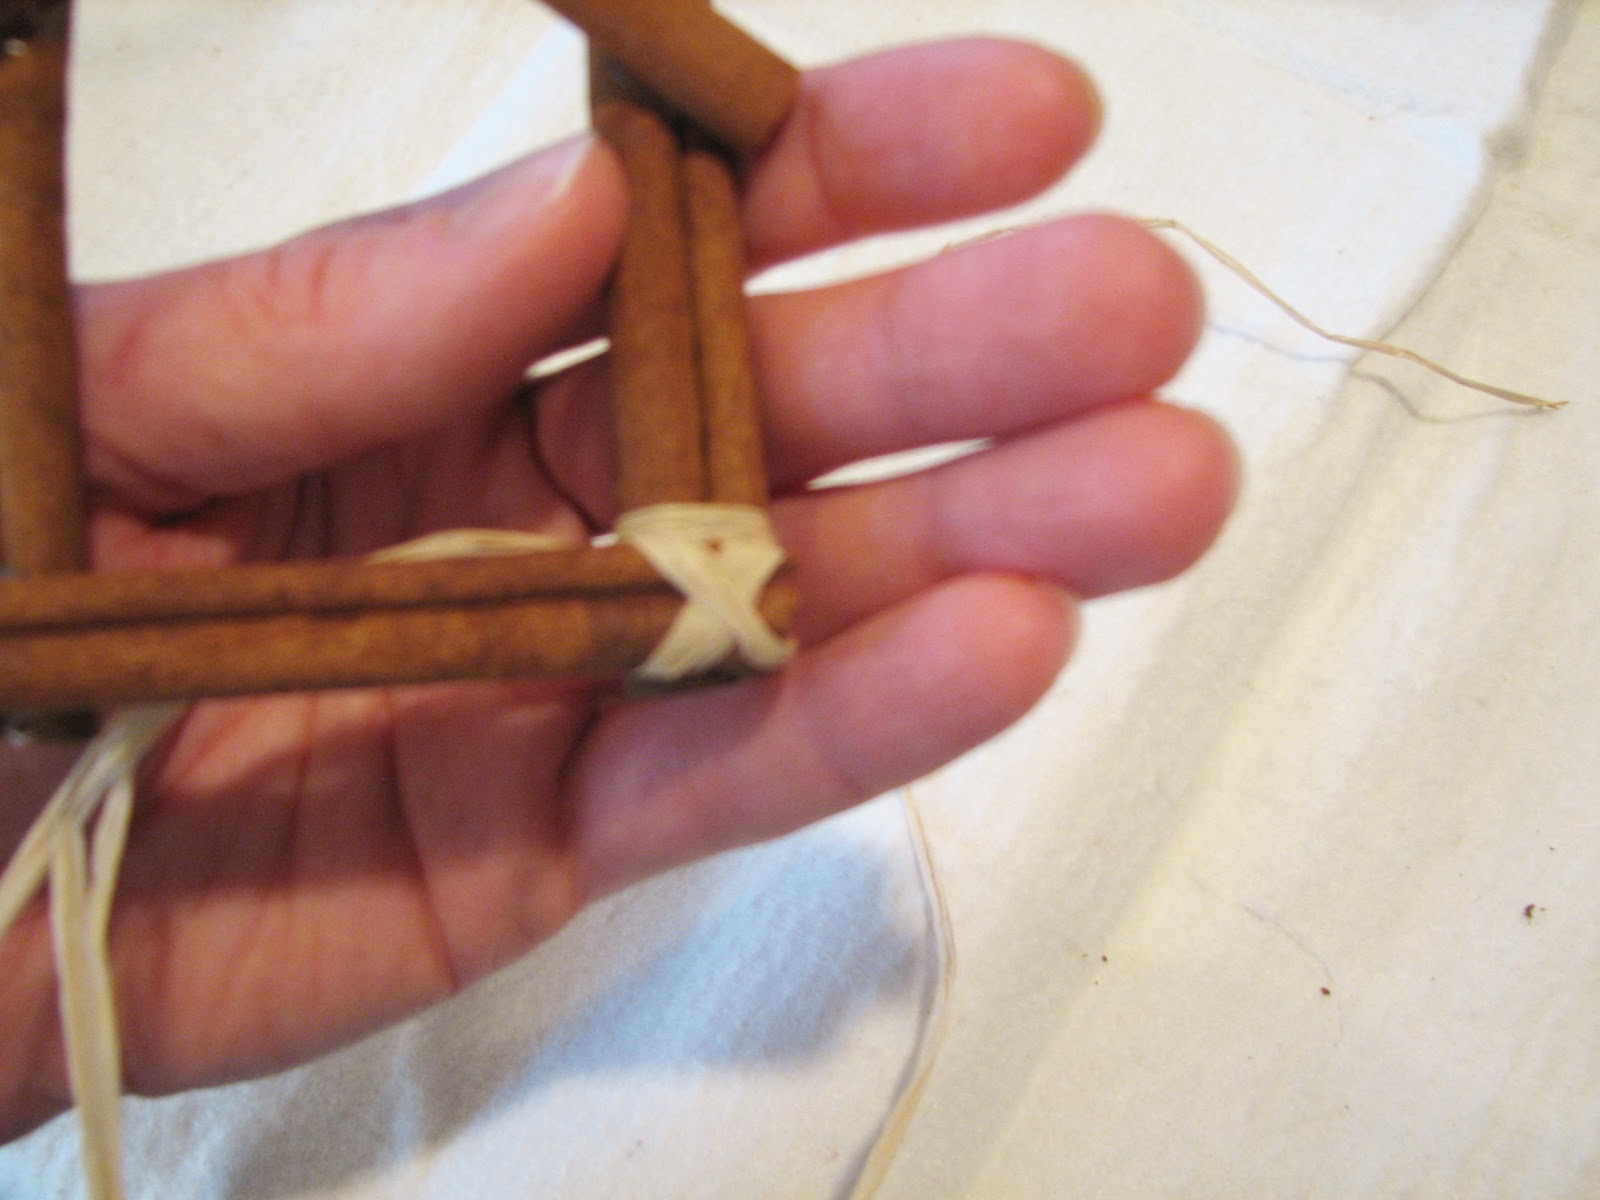
tying the raffia--
what you are looking for is a crisscross in the front
(it's kinda hard to describe exactly how to do it...just play with it until you get it.)
tie in the back and cover the knot with a dab of glue
if it seems to be slipping off...place a small dab of glue on the side to secure it
then, trim the excess raffia
(repeat on all 4 corners)
it should look like this on the back when you are all done with this step
Step #4
Glue on the star (anise)
(repeat on all 4 corners)
it should look like this on the back when you are all done with this step
Step #4
Glue on the star (anise)
Step #5
putting together Joseph, Mary and the baby Jesus
for Joseph-
break down an extra cinnamon stick until thin; glue on a clove ball
For Mary-
look for a taller, thinner piece of star anise (as compared to the baby Jesus)
turn in on it's end; glue on a clove ball
For baby Jesus-
(I forgot to take a picture)
find a shorter, wider piece of star anise (as compared to Mary);
turn it on it's side; add a clove ball
This is what they should look like all together-
(keep in mind that they should be both proportionate to one another and also the stable)
Step #6
Glue the Holy Family into the stable
(turn around to the back and secure them by adding more glue
where it won't be seen from the front)
Step #7
tie a loop of raffia for the ornament hanger;
glue on the back.
Trim any excess raffia and pull off any hanging glue strings
AND THERE YOU HAVE IT!
(please excuse my ugly tree)
This is a very forgiving craft (which is why I love it).
They are meant to be a little rustic and so perfectionism is not needed here.
Do what you like...what looks good to you.
They will be beautiful no matter what!
HAVE FUN!
Chunky Vegetable Bean Soup
I'm always anxious to find yummy foodies that are skinny and flavorful (cuz the two don't always come in the same package), meatless, full of nutrition and easy. This scrumptious soup fits the bill on all the above mentioned requirements. And....it's just so darn good.

Ingredients:
1 medium sweet onion, diced
2 cloves garlic, minced
1 medium sweet potato, peeled and cut into 1" cubes (can substitute other potatoes)
2 carrots, peeled and sliced into 1" pieces
2 stalks celery, diced
3 cups fresh spinach
Kosher or sea salt to taste
1/4 to 1/2 tsp black pepper
1/8 tsp allspice
1 tsp paprika
1 bay leaf
1/2 tsp crushed red pepper flakes (can substitute cayenne pepper or 1/3 cup salsa)
4 cups vegetable broth (can substitute with chicken)
1/4 cup freshly chopped parsley
1 (14.5) can diced tomatoes
2 cans cannellini beans, drained and rinsed (can substitute navy, black, pinto, red, or chick peas)
Directions:
Add all ingredients to the slow cooker, stir to combine, cover and cook on low 8 hours (4 on high if you are in a time crunch) or until carrots are tender.
If you prefer a thicker soup, near the end of cooking time, remove 1/2 cup of soup (veggies and broth) and place in blender. Add 1-2TBSP flour or corn starch and puree (or you can mash the ingredients and whisk the flour or cornstarch in). Pour back into crockpot and continue cooking until the soup thickens, about 15 minutes.
You can also try adding 1lb of your favorite cooked or canned meat (chicken, ham, beef).
Makes 6 1-1/2 cup servings
Basic Nutrition Information (per serving):
Calories: 182
Carbohydrates: 36g
Fat: 0g
Protein: 10g
Chunky Vegetable Bean Soup
Crockpot and Skinnylicious
adapted from skinnyms.

Ingredients:
1 medium sweet onion, diced
2 cloves garlic, minced
1 medium sweet potato, peeled and cut into 1" cubes (can substitute other potatoes)
2 carrots, peeled and sliced into 1" pieces
2 stalks celery, diced
3 cups fresh spinach
Kosher or sea salt to taste
1/4 to 1/2 tsp black pepper
1/8 tsp allspice
1 tsp paprika
1 bay leaf
1/2 tsp crushed red pepper flakes (can substitute cayenne pepper or 1/3 cup salsa)
4 cups vegetable broth (can substitute with chicken)
1/4 cup freshly chopped parsley
1 (14.5) can diced tomatoes
2 cans cannellini beans, drained and rinsed (can substitute navy, black, pinto, red, or chick peas)
Directions:
Add all ingredients to the slow cooker, stir to combine, cover and cook on low 8 hours (4 on high if you are in a time crunch) or until carrots are tender.
If you prefer a thicker soup, near the end of cooking time, remove 1/2 cup of soup (veggies and broth) and place in blender. Add 1-2TBSP flour or corn starch and puree (or you can mash the ingredients and whisk the flour or cornstarch in). Pour back into crockpot and continue cooking until the soup thickens, about 15 minutes.
You can also try adding 1lb of your favorite cooked or canned meat (chicken, ham, beef).
Makes 6 1-1/2 cup servings
Basic Nutrition Information (per serving):
Calories: 182
Carbohydrates: 36g
Fat: 0g
Protein: 10g
Heaven On Earth "Skinny" Soda Bread
Have you ever heard of Tastefully Simple? I LOVE Tastefully Simple food. So, so good. So many favorites...this Beer Batter Bread being right at the top. Others super tasties include, but are not limited to their Key Lime Cheese Ball and my newest indulgence the Irish Cream Fudge Sauce (added a TBSP to my hot chocolate yesterday. Squeal! I think I may be drooling...yep, I'm drooling.)
Anyhow...
I'm not trying to steal their thunder here. I promise. I LOVE them. And it's not the price of their products either, okay....maybe a little...but usually I am totally willing to pay that kind of money for that kind of perfection.
That's not the problem . The problem for us is that a lot of my favorite products, including the Beer Batter Bread, are manufactured in a plant with peanuts/tree nuts. That doesn't bode well for my child who is deathly allergic to cashews. I can make it here but he can't have any. Which means I can't give any to my other kids ("not fair"). Which means I end up making it AFTER the kids are in bed. And then it's just the hubby and I. And then I end up eating half of the loaf on my own (true story, happened yesterday).....and that doesn't go along so well with the whole "trying to lose weight" thing so I just HAD to find a better solution. These kids should not have to be deprived of such a delicacy and I should not be allowed to indulge alone in it.
I found a simple copy cat recipe and tweaked it a bit, making it a bit more skinnylicious.
So, without further ado.
Heaven on Earth "Skinny" Soda Bread
(commonly known as Beer Batter Bread)
adapted from this recipe at Food.com
Ingredients:
3 cups flour
1 TBSP baking powder
3 TBSP sugar
1 tsp salt
1 (12oz) can carbonated soda**--see notes
3 TBSP unsalted butter, melted (omit for "skinny"--trust me, it doesn't need it)
Directions:
Preheat oven to 375 degrees F. In a mixing bowl, whisk together dry ingredients. Add soda/beer all at once. Mix vigorously for 20-30 seconds, just until well combined. Batter will be thick and lumpy. Scrape and spread batter into a greased 9x5inch loaf pan. Bake in the oven 35-40 minutes, until sides separate from pan and knife in the center comes out clean. Turn out onto rack to cool for at least 30 minutes before serving. 12 servings per loaf (Nutrition Info--each slice: calories: 125, carbs: 30g, fat: 0g, protein 3g)
Notes:
The sweeter the soda, the sweeter the end product will be. Lemon-lime is fairly middle ground. Orange soda will make it VERY sweet and ginger-ale or club soda will drastically cut it down. Play with the recipe. Experiment. You can even use rootbeer, cola, or carbonated juice. Whatever. The carbonation is the key.
This recipe is fantastic as is. FANTASTIC!
But it's also very versatile. If you feel like mixin' it up a bit, here are a few variations.
Melanie's (that's me) Cinnamon and Sugar Soda Bread (pictured above)
Prepare recipe as directed above. Once the loaf is spread into the pan, pour 1 TBSP melted, unsalted butter over the dough. Combine 3 TBSP sugar with 1 tsp cinnamon. Sprinkle over melted butter and bake as directed above. Or divide into muffin tins for a scrumptious breakfast treat. 12 servings per loaf. (Nutrition info--each slice: calories: 145, carbs: 33g, fat: 1g, protein: 3g)
Other ideas from Tastefully Simple, themselves:
*Mix Italian seasoning and Parmesan cheese into batter for an Italian twist.
*Add carbonated juice, nuts, and diced fruit to make muffins or breakfast breads.
*Make cornbread by substituting liquid with a 16 oz can of creamed corn and 1/3 cup oil.
* Drizzle with honey
*Spread with butter and sprinkle with Seasoned Salt; then grill.
* Use cubed bread for bread pudding.
Also...a not so sweet version of this is SO SO SO GOOD with warm dips. Think spinach, and/or artichoke, nacho cheese, you get the idea. Ooohhhh...I think I may need a bib.
I hope you enjoy it. I know I will.
Tuesday, February 21, 2012
How To: Clean and Deodorize Your Dishwasher
Does your dishwasher look like this?
(or some other nasty variation of it?)
Do you find little food particles stuck to your "clean" dishes?
Do your dishes smell "fishy", even after they have been washed?
Mine did. And it was grossing me out. Big time.
All it takes is a little vinegar. Really!
HOW TO: CLEAN/DEODORIZE YOUR DISHWASHER
Step 1 Fill a cup or bowl with 1 cup vinegar (distilled white is best).
Step 2 Place cup/bowl on top rack of EMPTY dishwasher.
Step 3 Run dishwasher through a REGULAR wash cycle, hot of water as possible (heat dry not necessary)
VIOLA!
Not brand new...but a VAST improvement.
I even stuck my head in there and "took a big whiff".
Ahhh....fresh. No more "fishy" smell.
For more extensive cleaning/deodorizing try these tips:
1. Remove utensil holder and lower rack
2. Use an old toothbrush or dish scrubber to clean around inside of dishwasher door (paying close attention to crevices and rubber seal) with HOT soapy water.
3. Use a sponge or clean cloth to wipe down the entire interior of the dishwasher, including the bottom (pay close attention to the drain where food particles collect).
4. Replace utensil holder and lower rack.
5. Repeat steps 1,2 and 3 from above, only pour an additional cup of vinegar over the bottom of the dishwasher as well.
Simple as that!
Simple as that!
Thursday, January 26, 2012
"Angry Birds" Cake

Yeah...we're pretty big "Angry Birds" fans around here. The "fever" became even hotter when we got the kids Angry Birds: Knock On Wood Game
(I've become quite the master builder and they the master "knock-er-down-ers)
So it didn't surprise me too much when Little Red picked an "Angry Birds" cake for his birthday a few days ago.
We googled and pinterested (Yep. I make up my own words) and didn't come up with anything this cake decorating rookie thought she could manage. Everything was made with fondant (including the characters), which I DO NOT do (I can barely handle store bought tub frosting), so I had to come up with something else. I packed all 4 of my XY's into the car and headed to Winco with this particular card (which Little Red picked out from the game) as inspiration.
Shopping for ingredients becomes a difficult task when you have a child with nut allergies (birthday boy) so we had to get creative. The original plan was to use Little Debbie Nutty Bars (which I would still recommend using if you can) but turns out they are manufactured in a plant with tree nuts (he's deathly allergic to cashews) so we had to strike that plan and find another solution. We settled for these instead:
Now...for the birds/pigs.....
We scoured the bulk section and decided on these:
It took a bit of time, manipulation, and a tooth pick, but I was really satisfied with the results.
![]() |
| The pigs |
![]() |
| black and red bird |
![]() |
| yellow birds |
pigs: green Tootsie pop, Tootsie rolls
black/red birds: Tootsie pops, Tootsie rolls, sprinkles (for eyes)
yellow birds: dots in center (to form Tootsie roll around), Tootsie rolls and sprinkles (for eyes)
Now for the cake:
I used a regular 9 x 13 sized cake (you could definitely go bigger) and frosted and textured it, with the back of a frosting knife. You could also try coloring coconut and sprinkling it on top (I didn't because my kids don't like it).
Add some regular ol' kabob skewers to stabilize the structure (if using Nutty Bars you may not need these...just a bit of frosting to hold it together)...
even from the back
and WALLAH!
ANGRY BIRD CAKE!
Now....I have to say that I would STILL recommend using the Nutty Bars if you can.
Cream filled cake pieces were just not as stable (even with the skewers) as I would have liked them to be.
After falling over three times, from the sheer weight of the structure,
we decided to let it rest.
The kids thought that was pretty cool too.
("Just like in the game")
Whew...thank goodness.
The best part about it...
the entire thing was edible (unlike nasty fondant).
The birds/pigs were the kids favorite part.
and when they're happy....I'm happy.
It was a really fun project/cake. I wouldn't hesitate doing it again.
So what do you think? Any ideas on what I could have done to make it more stable? I'd love some feedback!
Subscribe to:
Posts (Atom)